
Before...
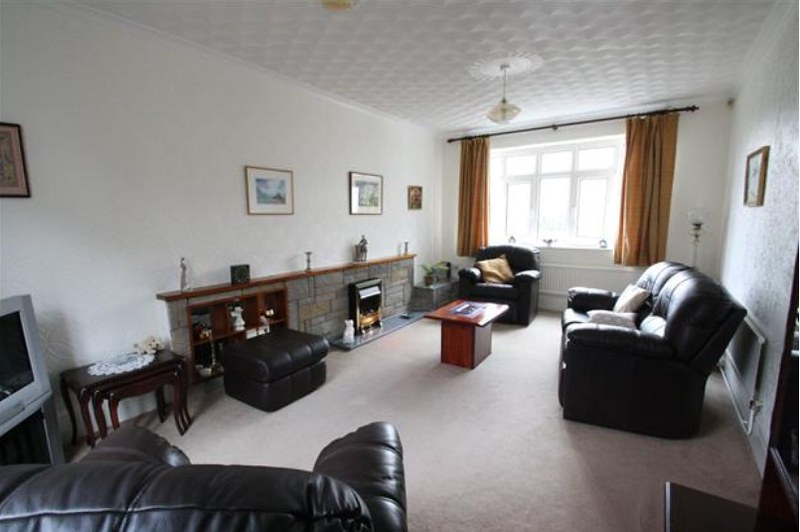
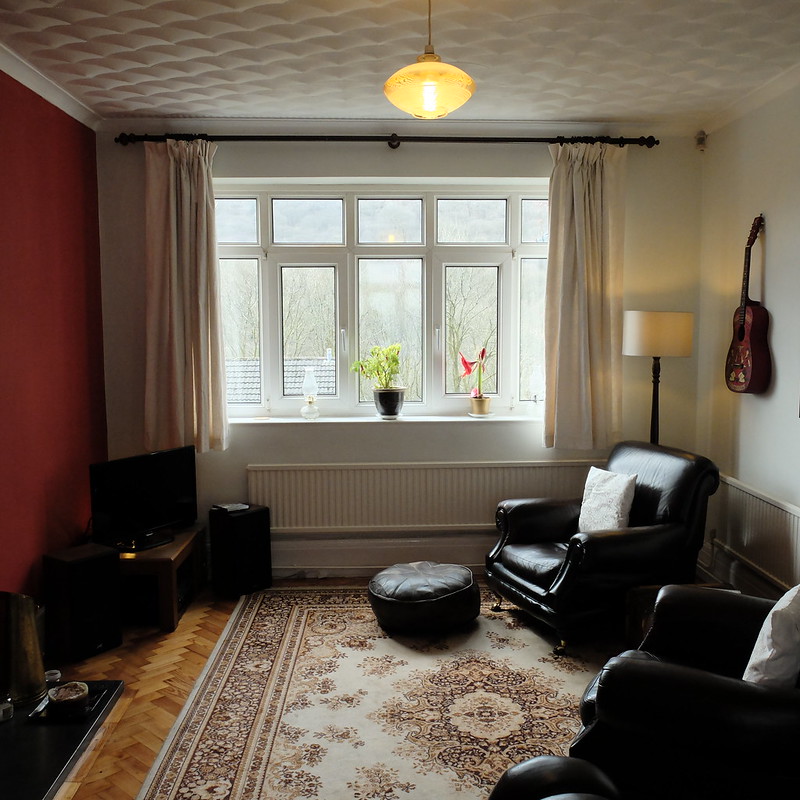
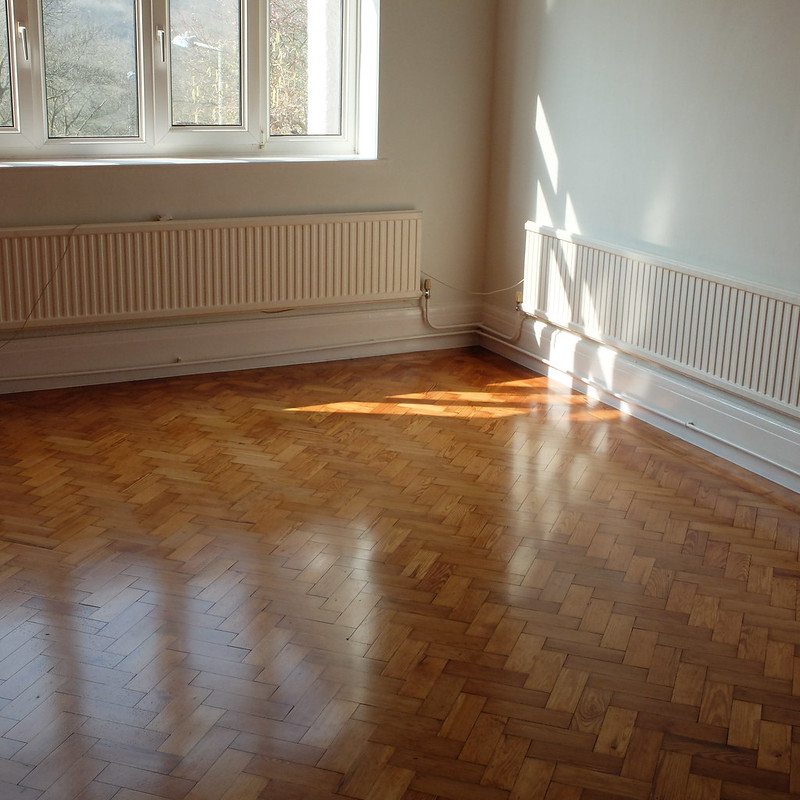
The room was very white and plain, with a beige carpet that was sun-bleached in parts. Textured walls, a feature stone wall with built-in mirrored knick-knack shelf and an electric fire all made it feel very outdated, and not in a good vintagey way. The room had been extended in the '70s, so an additional problem was that the lovely original parquet flooring stopped two-thirds of the way along the room, with the new section having a particularly horrid lino flooring.
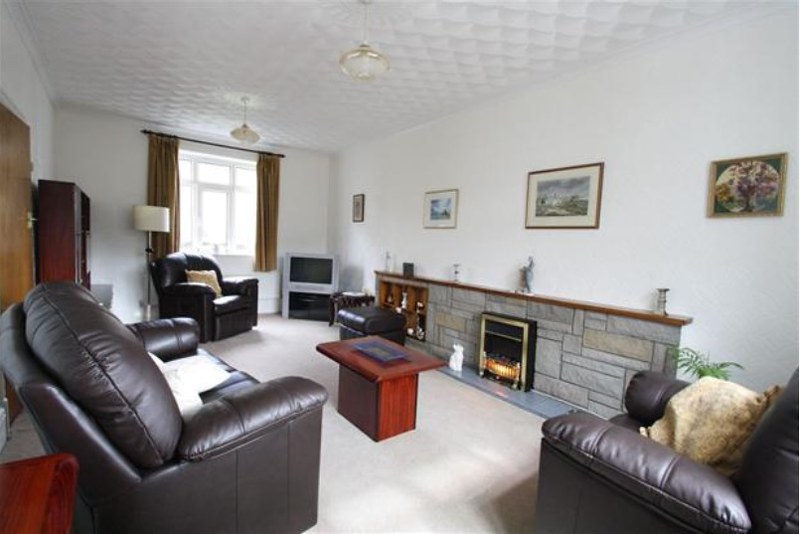
Above and below: How the living room looked when we viewed the house
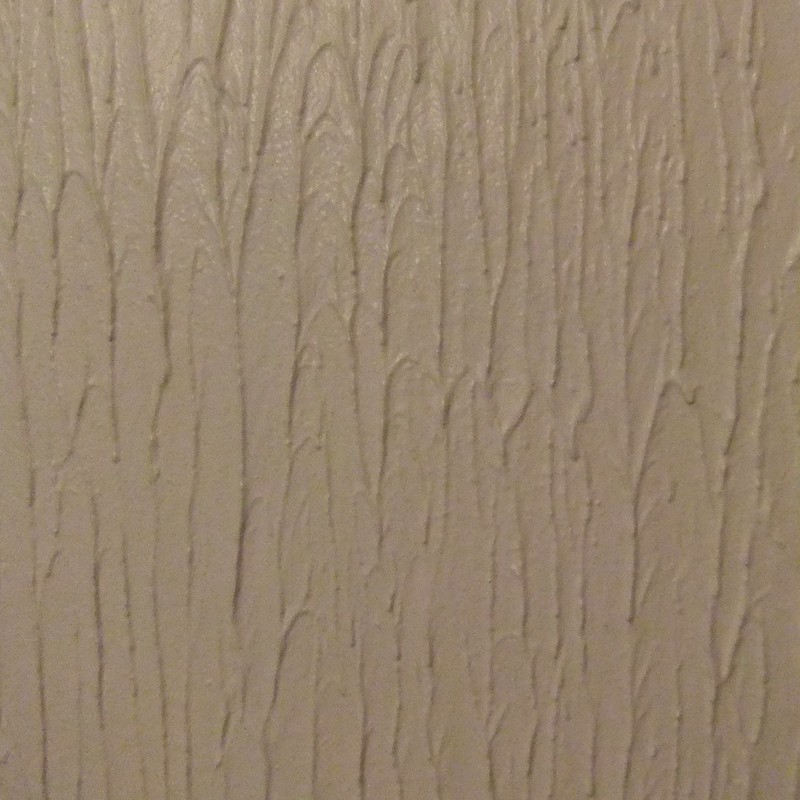
Above: Three walls were covered in this textured artex
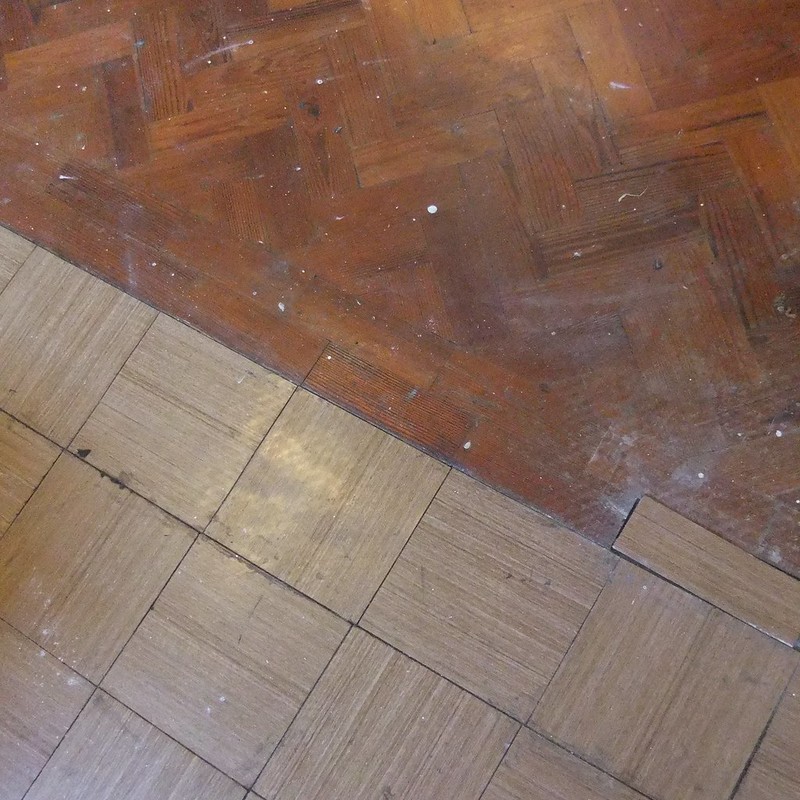
Above: The damaged parquet in the original section, and the laminate flooring in the extension.

Above: Work in progress, after the feature wall was dismantled and the fireplace was opened up
Drumroll please...
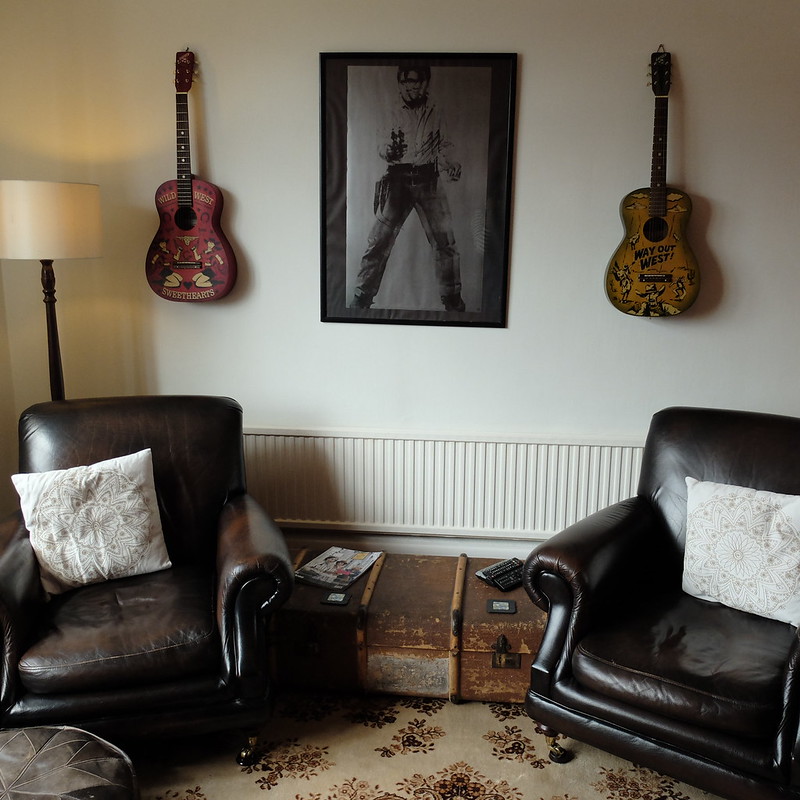
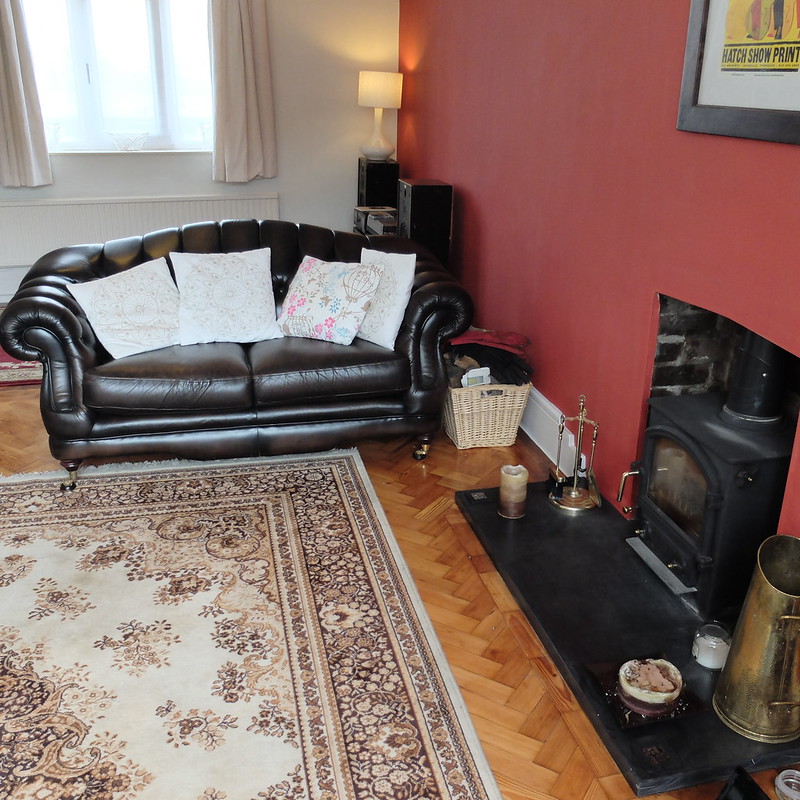
...ta da! Here is the finished lounge:


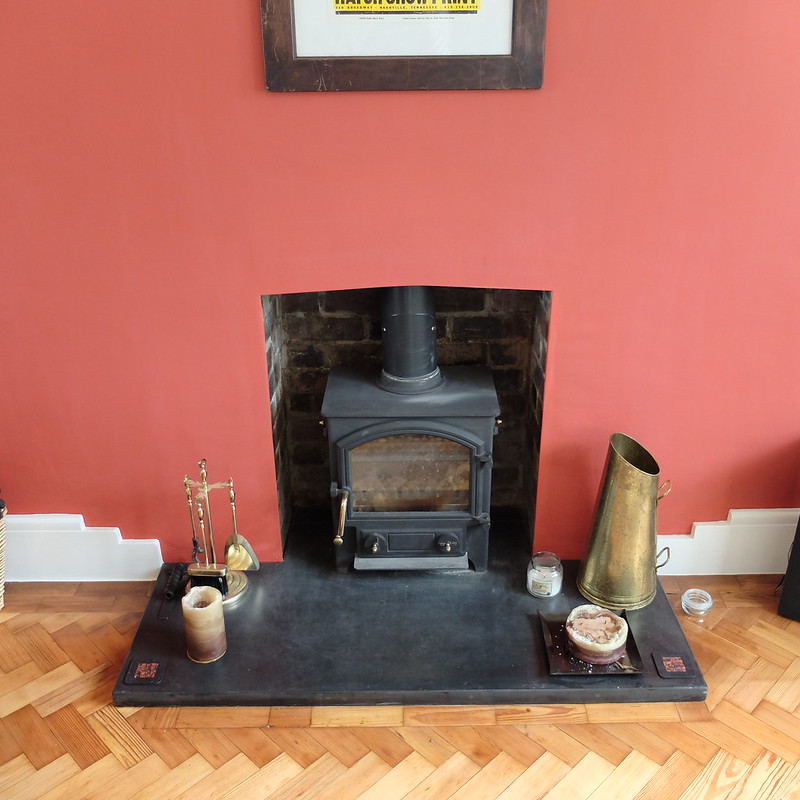
Slate hearth from reclaimed snooker table

Custom built Deco inspired shelving
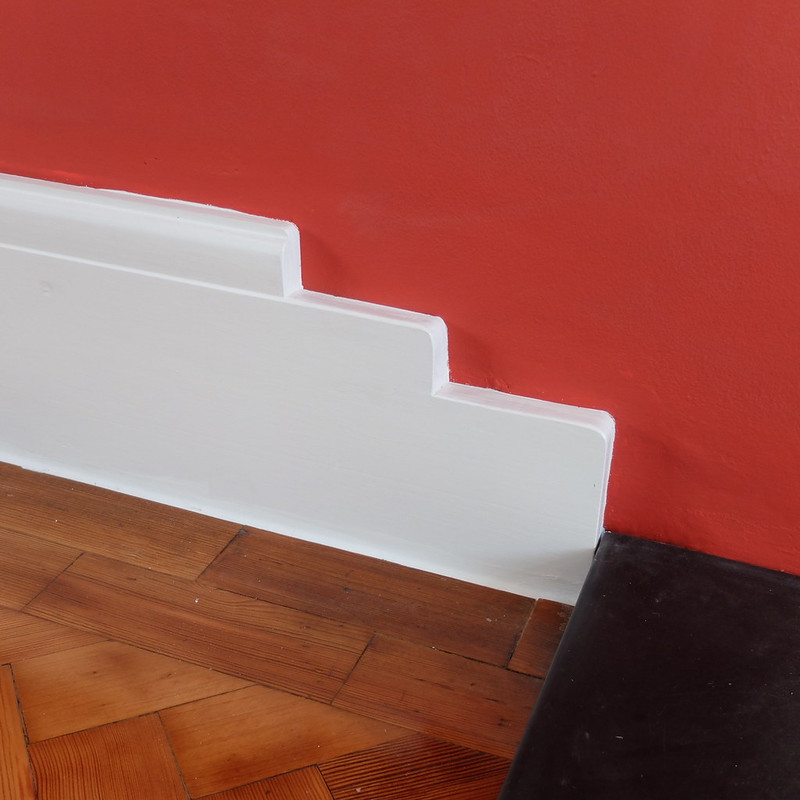
Custom skirting board detail
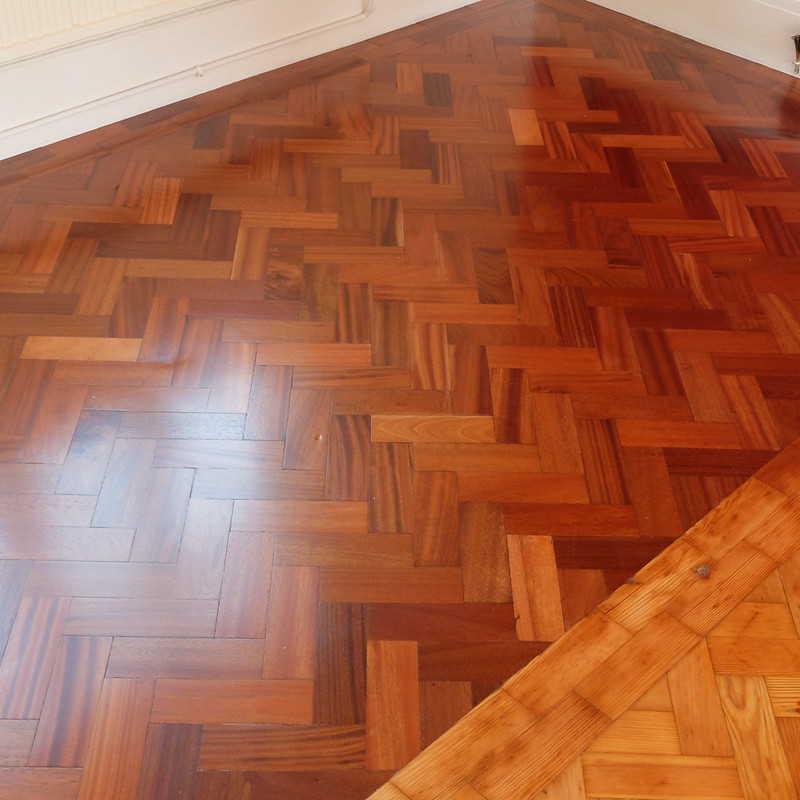
And just a few snaps to show you what the parquet looks like underneath the rugs.
Biggest Bargain
We were incredibly lucky to have the gorgeous Thomas Lloyd leather sofa and chair set for free. Thomas Lloyd is a high quality UK manufacturer of leather furniture, and they're made just up the road from us. A girl who was a friend of a friend was upgrading their sofa the same week we moved into the house, so we just had to hire a van (£60) to transport them. The girl's Dad had to come and take the pane of glass out of her living room window to enable us to get the sofa out of her house, as the hallway was too narrow! My husband looked like a mime artist holding the glass in place with special gloves... When we got to our house, it was a bit of a mission just my husband and I getting the sofa out of the van and into our house (down steps, round corners!) without anyone else to help us, but you can move mountains when you need to. Brand new, the sofa and chair set would have retailed in the thousands. £60 and a bit of brute strength was a small price to pay!
Biggest Splurge
The woodburner was absolutely a luxury. We didn't 'need' one, but we decided it would be a great focal point for such a large room, and living in a cold and damp climate as we do meant it would certainly get used! We did a lot of research online to find out the best option, and discovered that Town and Country Fires based in Yorkshire make their stoves from start to finish (not everyone does) and that they used to supply a more top-end brand. So, good quality - and much cheaper. We found the best price at Colin Laver in Pontypridd. Installation was through a local company, New Heat, who were half the price of another installer in a posher postcode down the road.
Renovation stages
The renovation included these stages (all done by my husband else otherwise stated, by himself mainly!!):
- Knocking down the feature wall
- Removing wallpaper and having the textured walls re-plastered over (employed plasterer)
- Fitting a slate hearth
- Having a woodburning stove installed (employed installers)
- Digging out the concrete floor of the extension
- Finding water pipes buried in concrete(!), so moving water pipes (employed plumber)
- Re-laying concrete to the correct level
- Painting the walls
- Making custom skirting boards (employed carpenter)
- Laying floor levelling compound
- Preparing reclaimed parquet for laying
- Laying the parquet
- Sanding the parquet
- Cleaning up after the sanding
- Glazing the parquet
- Painting pipes and skirting boards
- Building custom CD shelves
I say 'finished' but we still would like to find a mantelpiece of some description (heat proof because of the proximity to the stove!) and more pictures and artwork once we decide what we want. We also need some kind of custom unit to house the TV, speakers and electronics. The white vintage lamp needs a different shade, the door needs replacing, and we may change the existing ceiling lights. All in good time...
As you can probably tell, this has all been incredibly time-consuming, and even though we did everything we could to keep costs down, it's invariably ended up being somewhat of an investment in the house. So, how much has this all cost? Brace yourselves - we're talking thousands. The woodburner purchase and installation, including the slate hearth, came to around £2,500. On top of that, we paid to have the walls plastered and for a plumber to move some pipes, and also bought DIY materials and furnishings. I estimate around £3,500. It is a lot of money but this wasn't a 'quick fix', we wanted to do a proper job so that we wouldn't have to touch the room again for years. My husband put blood, sweat and tears into the renovation, and its thanks to his skill and determination that we have such a wonderful finished room, at a fraction of the price. In terms of value for money, we're really happy with what we've got. The room originally felt like a big empty space, but now it is a cosy room that feels like home. I know it won't be to everyone's tastes, but it suits us and our lifestyle. It is honestly so nice to have our lounge back properly after so long!!
Have you ever undertaken a big DIY job in your home? How did you cope with the mess and stress?!
Deco inspired CD shelves: Custom built by my husband, timber was £80
Coffee table: Vintage trunk, antiques shop, £10
Leather sofa and armchairs: Thomas Lloyd of Treorchy, *free* via a friend, but £60 to transport
Rug: Vintage, bought from an elderly lady via Gumtree for £50
Hardwood parquet: (in extension) reclaimed, from a 1950s bungalow in Merthyr! £50
Slate hearth: Reclaimed slate from pool tables, custom made for £160
Brass coal scuttle: Car boot sale in Cornwall, £8
Fireside set: Car boot sale, £2
Cushions: Sainsburys, £1.50 each in sale
Curtains: M&S, they were in an upstairs bedroom when we moved in
Leather foot stools: Charity shop, £5
Standard lamp and shade: Charity shops, maximum of £5
Skirting boards: Custom made by Seasons Joinery, Ton Pentre, with the stair-step feature added by my husband, £30
Woodburner: 'Little Thurlow' by Town and Country Fires, via Colin Laver, Pontypridd
Woodburner installation: New Heat, Treorchy
Red wall: Crown, 'English Fire'
White walls: Sanctuary, 'Soothing Matt'
And to my husband... THANK YOU!!!

How gorgeous is that floor? I love it! I've never understood painting a big room white like the before picture, to me it looks so cold and stark. I so need shelves like that for all of our books/dvds/cds.
ReplyDeleteI think white interiors needs a warm climate!! Not suited to Wales.. x
DeleteWhat a transformation! From a big, bland space to a cosy and stylish room. The floor is fabulous and the bespoke shelving is brilliant.
ReplyDeleteEverything in our house has been totally transformed by Jon - from knocking through bricked up fireplaces to buildin an upstairs bathroom from scratch. He'll have a go at anything , bless him. xxx
I've still got the home magazine with your feature in, Jon has skills!! Xx
DeleteOh wow! You did such a great job. I really like the result and especially that floor.
ReplyDeletexx
Sandra
Thank you Sandra! Xx
DeleteWhat a fabulous room your living room has become. Really cosy. Love the parquet flooring and those cd shelves are awesome! Well done to your husband! xxx
ReplyDeleteAw thanks, I will pass on all these lovely comments to him! Xx
DeleteI love that I've seen it all first hand ;) just as cosy in real life. Can't believe what it looked like before - what an amazing job. You should both be really proud of what you've achieved :) xx
ReplyDeleteWow! Someone has a massive CD collection! LOL
ReplyDeleteThis turned out great! I love the colour you chose for the feature wall. What a TON of work. Kudos for getting through the whole process without divorcing!
That parquet flooring is so special.
I have redone my own office by myself which included removing old carpeting and laying down a click in faux wood flooring, repainting and a new light fixture. It was lots of work but I'm so happy I did it.
Then my husband helped do his office and it went much faster with both of us working on it. Now we both love our offices, but there were some tense moments during the process. Any kind of reno brings out additional stress and disruption of your life.
This last time we had to hire professionals for the bathroom and a leak we had in the ceiling. I'm so happy we did. If we had the $ I'd redo the other 2 bathrooms as well. It makes a difference to live in a home you really love.
bisous
Suzanne
http://www.suzannecarillo.com
Oh yes, tension and disruption bubbles up in this kind of thing. I felt helpless at times because I had to go to work and could only help on weekends, and then I could only physically do so much. I did buy him whisky but I think I'm in debt for a few more bottles at least!! Your place sounds fab, I remember the pics of your office xx
DeleteWhat an incredible transformation! The parquet flooring is stunning, I love, love, love parquet!! The staggered skirting is so classic and the cd shelving library is super cool. So much went in to that room and it really shows through. Enjoy having a gorgeous, personal living space, you deserve it. And I cant believe you managed so much on such a low budget. Bargain queen strikes again!
ReplyDeleteWell we always have more time than money, so bargain hunting is a necessity!! More fun too than choosing out of catalogues. Thank you for such nice feedback xx
DeleteWow, you did such a great job! The room feels much more cosier then before! I love your rugs!
ReplyDeleteWhen I moved in my current place I had to do lot, although it's not as much as you had to do. Anyways, the previous tenant lived here for over 30 years and was a smoker. So everything (walls/ceiling/ecc.) was covered with nicotine. It was so disgusting and it took a lot of time to get everything clean again. There was also a kitchen fire which wasn't cleaned up. The ceiling was covered with soot and part of the kitchen was damaged too.
And still, I fell in love with this place. It's a lovely 20s apartment with lots of light in a great neighborhood.
Luckily the owner took his part in cleaning/renovating my apartment.
Oh gosh I can imagine the hard work with clearing up smoke damage! But glad it got done in the end x
DeleteAn amazing transformation! I love everything about the new room - the colours and style, the furniture and that wonderful CD shelving. Congratulations - I hope you'll have many, many happy times in your lounge! Kx
ReplyDeleteThe perfect house! You guys did such an amazing job and wow for getting those lounges for free, they are beautiful! The library shelves really caught my eye too, they really make the room extra special x
ReplyDeleteOh, that looks beautiful! So much better than the way it was. That parquet flooring is simply gorgeous, and your bargain-hunting skills clearly came to the fore when you got that sofa and chair. Your deco shelving gives me serious envy...
ReplyDeleteOur house is an ongoing DIY project; we did loads when we moved in (new kitchen, installing central heating) then ignored everything for ages. We've got the urge to work on the house again now, though: the windows and door at the back were replaced earlier this year, and we've just had the bathroom redone. It's nice to get a home the way you want it.
I have been enjoying your bathroom photos! It is nice to get things done but we will probably have a break for a bit and do some stuff outside. I can't mention 'sanding' without my husband twitching... x
DeleteIf you have any tips for using a belt sander, we could do with them - we spent £70 on one and burnt it out after two floorboards!
DeleteBloody shower is leaking water into the kitchen too, I'm not very pleased with the plumber right now...
I feel your pain - the sanding was horrid. Got through SO MUCH sandpaper. The old varnish just clogged it up so we went round on our knees hand-sanding to get as much varnish off before trying the belt sander again. Sorry to hear about your leak!!
DeleteAmazing work! Congratulations on getting your living room complete! Looks amazing!
ReplyDeleteThank you lovely! X
DeleteGah it's wonderful so much more warm and cozy and much more practical, you've both done an amazing job! I still can't get over how fabulous the shelving unit is your husband built it fits so well with the 30's aesthetic, and that Parquet floor is what dreams are made of its beautiful! xx
ReplyDeleteI know not everyone likes cosy, glad it seems to have gone down well! Not sure my husband would agree about dreams and parquet, I think he had nightmares about it at the time!! Xx
DeleteSomething that I feel isn't easy when you're going for a vintage look is to make a place retain its vintage charm while still being comfortable, practical and easy to live in - you have definitely achieved all of this and the result is fabulous! This is such an incredibly elegant room and everything comes together perfectly and it's all very personal and cosy despite how immaculate everything looks. The rugs, the books and the guitars make it look like a very cool place to hang out, I feel both envious and inspired!
ReplyDeleteAw thank you, that's high praise! It is definitely tricky balancing everything, but my main fear was expressing ourselves enough and not having it too generic. So thanks particularly for the 'personal' comment, phew! X
Deleteamazing work!i know that belarusian women
ReplyDeletewould love this!already shared this post!thank you
How did I miss this post?!! What an absolutely fab job you and your husband have done. The parquet flooring is a absolutely stunning, I dream of having a floor like this one day! I also love the CD shelving and skirting boards. Just perfect. xx
ReplyDeleteoh my god WOW!! Your living room looks amazing! I absolutely love the custom built shelves your husband made, they are beautiful and I would love to know more about those wild west guitars! It must feel so rewarding seeing all of your hard work pay off so beautifully.
ReplyDeleteThe guitars are two of the four special releases in the Gretsch Americana series, we have the 'Wild West Sweetheart' and 'Way Out West'. There's also a 'Sundown Serenade' and I can't remember the fourth one!! Xx
DeleteWhat a marvelous, elegant room you've created. I can't possibly begin to doff my hat enough at you both for the incredible (and endlessly inspiring) DIY work you've put into your home. You deserve your own TV reno show, if you ask me!
ReplyDeleteMany hugs,
♥ Jessica
Your home is gorgeous! I have an odd question...wondering where I could find the source to make a printable of your logo with the M in the boxwood wreath. My friend loves it and wants to try and stencil or transfer it onto a pillow case. Thanks in advance! power recliners
ReplyDeleteHi Hannah, you can save the image by right clicking, then blow up and print to make a stencil. We did that for our piano!
ReplyDeleteThe new room definitely has a lot more character what with that whole corner built up nicely with that storage unit for all the CDs and DVDs! And if that isn't an impressive collection, I wouldn't know what is!
ReplyDelete